Zoner Photo Studio: White Balancing, Vignetting, and 3 Other Adjustments to Improve Your Winter Landscape

It is said that every photo needs some adjustments. However, for some types of images, it is a good idea to repeat the basic procedure. These include photos featuring winter landscape.
As a rule, you need to set the correct color rendering, highlight the main theme, give the picture dynamics or a more dreamy atmosphere.
How to Adjust White Color
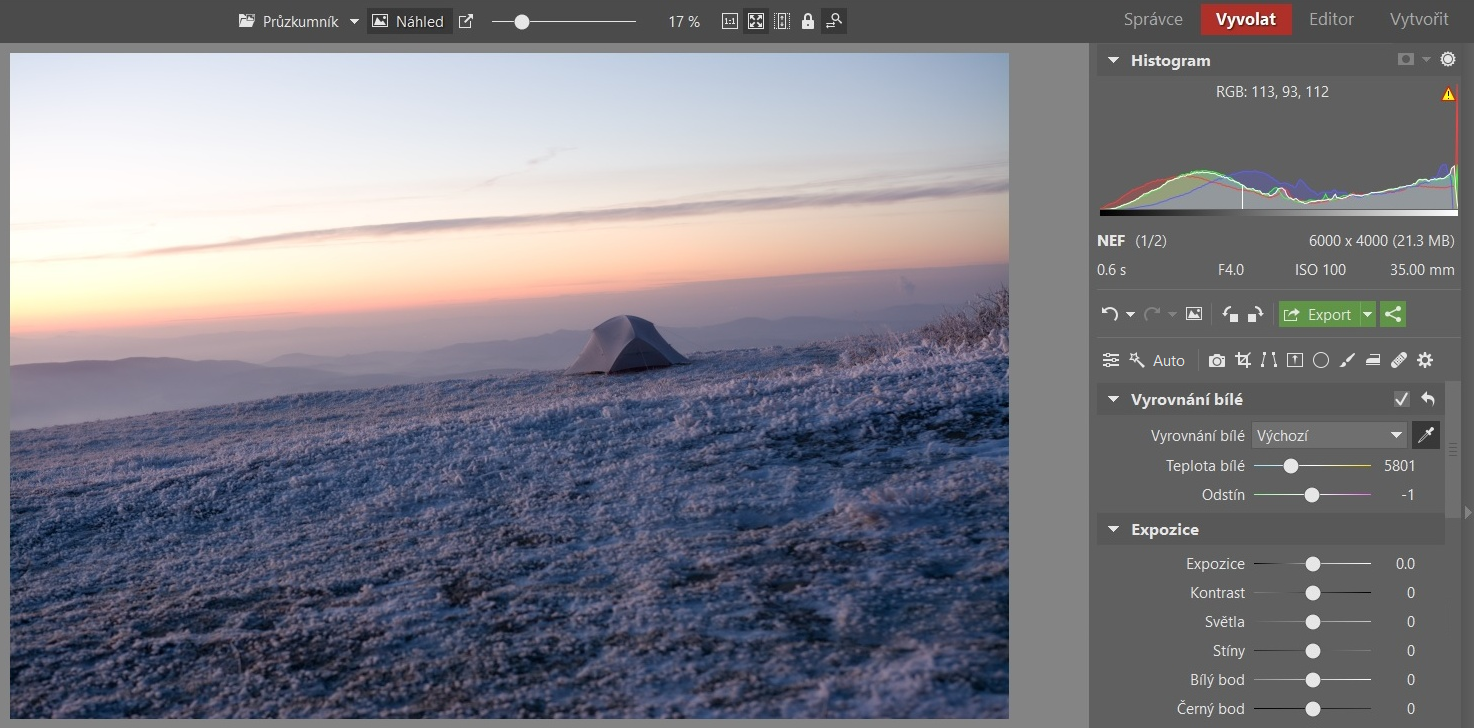
Most winter-themes photos are overly white and many cameras have problems to deal with this. The snow is not pure white but rather gray or bluish.
You can deal with this matter easily though. Just open Zoner Photo Studio X, open the Invoke module, and click on the White Balance tab.
For proper white balance, use the eyedropper and select a color-neutral place on the image with it. That is, one that has neutral gray or of white color. In the case of the winter landscape, click on the snow.
Use the slider to fine-tune the white color of the image. If you want to get the frosty look of the photo, stick to cooler tones.
Vignetting as a Method to Emphasize a Theme
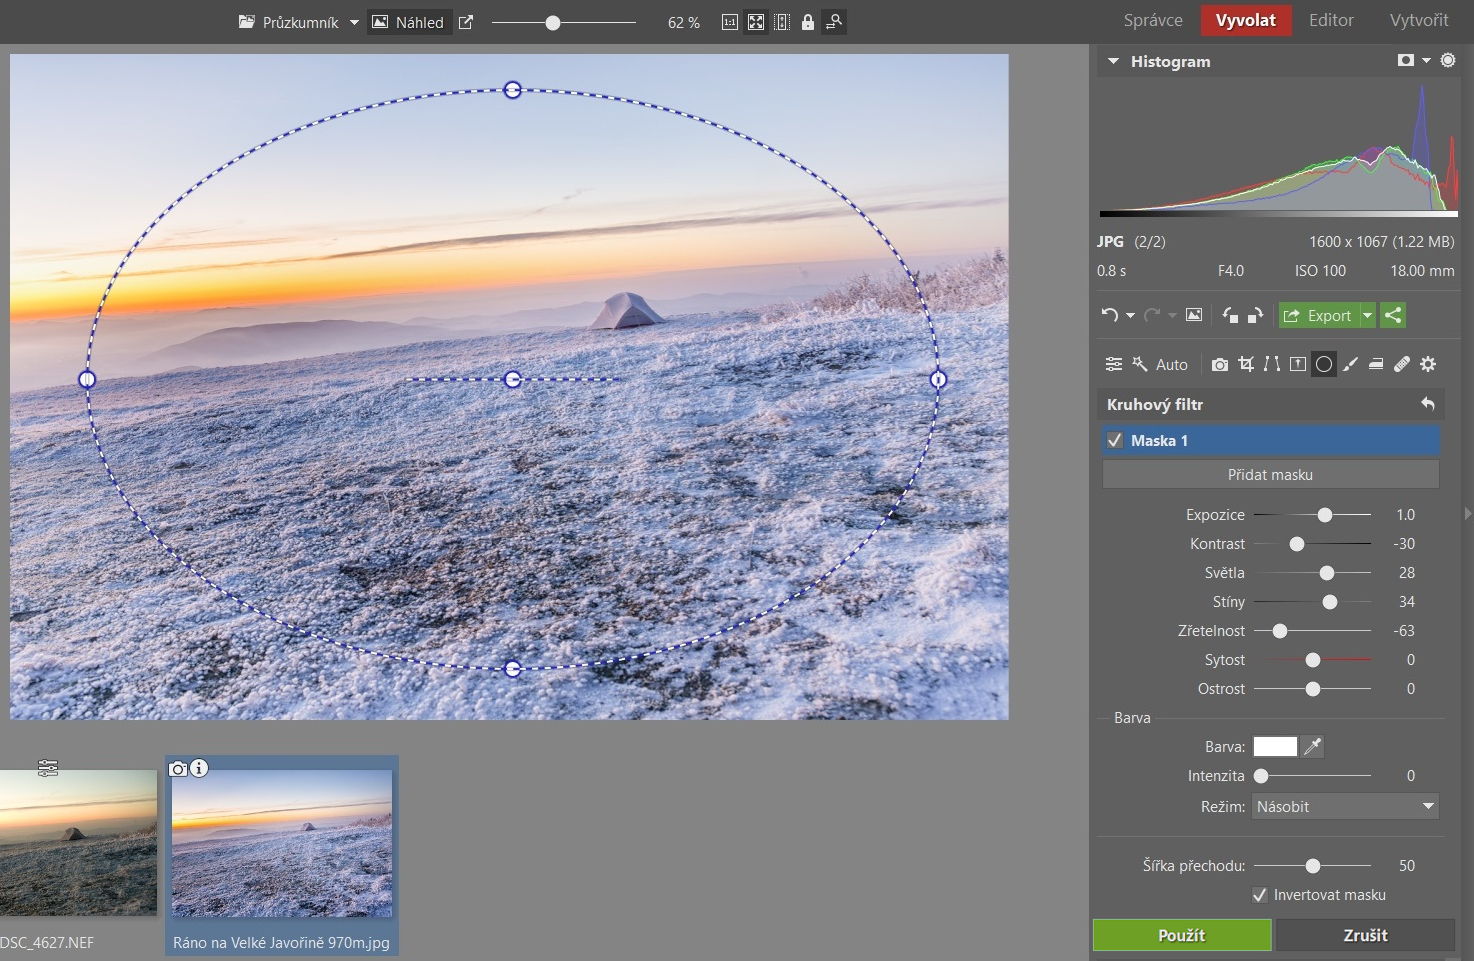
To attract the eyes of the viewer to the part of the photo you intend to, use vignettes. However, the classic vignette is black, and it is too distracting on winter-themed pictures. Try a white variant. The pictures of the winter landscape are much more natural and do not lose their function.
You can add vignettes on the Effects tab. Just adjust its strength and the radius in which it will appear.
You can also reach the Circle filter. Use it to highlight part of the image you want to highlight. Then, you invert the selection and set the required parameters. Typically, for example, an increase in Exposure, adding a Light, shading clarity, or reducing clarity may be useful
If the white vignette is not the right fit for your picture, you do not need to apply it at all. Or simply use the classic black.
Mysterious Landscape? B&W Transfer Filter Will Help
A high-quality b&w picture capturing winter landscapes can really attract viewer's attention. For example, a black-and-white winter landscape with traces of snow looks mysterious. So try to convert your pictures to black and white.
Check the Grayscale tab on the Color tab. At the same time, after transferring the photo, try playing with different color channels by using the Manual channel mixing feature.
You do not even have to worry about transferring pictures with the red channel dominance. Just use the sliders to highlight other color channels, or use polarization. You will see that you will finally get the desired result.
Magic with Mist
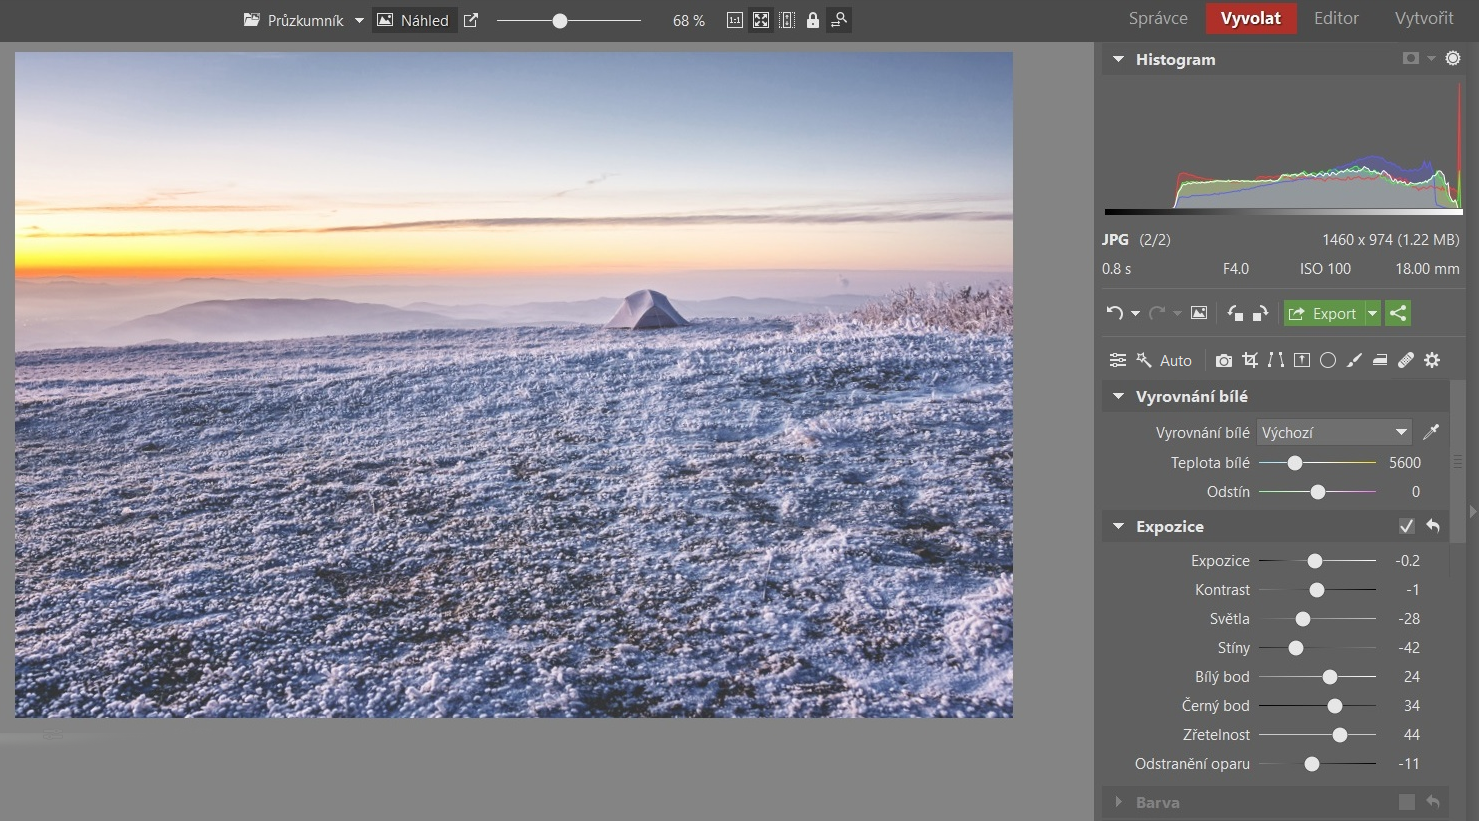
Zoner Photo Studio includes many features. From time to time try out something you do not know yet. The Haze removal feature might be one of them. It can either remove the haze or emphasize it. With this effect, you can also get an "instagram" photo look.
If your photos seem to be boring or faint, do not be afraid to add some level of contrast.
You have several options to do this by using:
- Curves
- Levels
- or the Contrast slider.
Each of these features has a slightly different effect. It is therefore good to play with each one separately and gradually adjust the picture to your liking.
Watch the Histogram
Recent adjustments should include histogram and drawing. Winter photographs are usually overexposed and hence loose their features. It is usually good to check the histogram in bright places of the photo when editing.
Finally, export the photo. And if you change the photo size when exporting, be sure to sharpen it. Otherwise, the reduced photo would look blurry.
Then you can still publish the image. And compare it with the original beforehand. You will see that a few quick and basic adjustments will benefit your winter landscape pictures.
Text: Josef Gabrhel, Milujemefotografii.cz
| Discussion at the article (0) |
Related Articles

Zoner Photo Studio: Do Your Travel Photos Lack Dynamism? The Clarity Tool Will Help You

Zoner Photo Studio: How to Find a Photo without Endless Folder Browsing

Zoner Photo Studio: The Best Ways How to Share Your Travel Photos
Guide:
Important Information:
![]() Information and warnings on travelling abroad is to be found HERE.
Information and warnings on travelling abroad is to be found HERE.


